

Global Multi-Cloud Load Balancing & Traffic Routing
Introduction
This project demonstrates how to deploy and configure a globally distributed, multi-cloud load balancing and traffic routing setup. The goal is to have our services (running on VMs or containers) in AWS, Azure, and Google Cloud, and route incoming traffic to the nearest or most optimal location using each platform’s global routing features. This approach is essential in the real world to achieve:
High availability: Traffic is automatically rerouted if one region becomes unavailable.
Low latency: Users are served from the closest or best-performing region.
Scalability: Each cloud can auto-scale resources based on demand.
Flexibility: Having multiple clouds reduces vendor lock-in and leverages the best features of each provider.
Prerequisites
Required Tools & Accounts
AWS Account Use the Free Tier (no credits required if you stay within usage limits). Services needed: AWS Global Accelerator (or Route 53) and EC2 (or ECS if using containers). Owner or Administrator role in your AWS account. AWS CLI installed locally.
Azure Account Use the Azure free account (no credits required if you stay within usage limits). Service needed: Azure Front Door for global load balancing, plus Azure Virtual Machines or Azure Container Instances. Owner or Contributor role in your Azure subscription. Azure CLI installed locally.
Google Cloud Account Use the Google Cloud Free Tier (no credits required if you stay within usage limits). Services needed: Google Cloud Load Balancing (HTTP(S) Load Balancer or Cloud DNS for traffic routing) and Compute Engine or Cloud Run for the application. Owner or Editor permissions on your GCP project. gcloud CLI installed locally. Enabled APIs: For instance, Compute Engine API and Cloud Load Balancing (usually enabled by default, but confirm in the console).
Important: Stay within the free tiers to avoid charges. Double-check usage limits (e.g., hours of VM usage, data egress, etc.).
Step-by-Step Implementation
We will create a simple “Hello World” service on each cloud platform, then configure global routing so that a single endpoint routes traffic to the nearest or best-performing service instance. We’ll show how to do each step via the Cloud Provider Web Console (GUI) and the CLI.
Note: Every step below indicates both Manual Steps (GUI) and CLI steps together, so you can choose the method you prefer.
AWS Configuration
Step 1: Create an EC2 Instance or ECS Container
Manual (Console) Sign in to the AWS Management Console. Navigate to EC2. Click Launch Instances, choose a free-tier eligible Amazon Linux AMI. Select the t2.micro instance type (free tier). Configure defaults and set a key pair for SSH. Under User data, optionally insert a startup script that runs a simple HTTP server on port 80 (e.g., python3 -m http.server 80). Launch the instance.

Configure AWS CLI with your credentials first:
aws configure
Create a security group to allow HTTP traffic (port 80):
aws ec2 create-security-group --group-name my-web-sg --description "Allow HTTP"
SECURITY_GROUP_ID=$(aws ec2 describe-security-groups --group-names my-web-sg --query "SecurityGroups[0].GroupId" --output text)
aws ec2 authorize-security-group-ingress --group-id $SECURITY_GROUP_ID --protocol tcp --port 80 --cidr 0.0.0.0/0
Launch EC2 instance :
aws ec2 run-instances \
--image-id ami-0c02fb55956c7d316 \
--count 1 \
--instance-type t2.micro \
--key-name <YOUR_KEY_PAIR> \
--security-group-ids $SECURITY_GROUP_ID \
--user-data '#!/bin/bash
yum install -y python3
cd /home/ec2-user
nohup python3 -m http.server 80 > server.log 2>&1 &' \
--tag-specifications 'ResourceType=instance,Tags=[{Key=Name,Value=MyGlobalAppAWS}]'
Step 2: Set Up AWS Global Accelerator or Route 53
Manual (Console) Go to AWS Global Accelerator (or Route 53 → Create Hosted Zone if you prefer DNS-based routing). For Global Accelerator: Click Create accelerator and attach the EC2 instance endpoint or an Application Load Balancer if you created one in front of the instance. For Route 53: Create a new public hosted zone, add a record set (A record) pointing to the instance’s public IP (or the ALB DNS name). Use Latency Routing Policy to direct traffic to the nearest region.
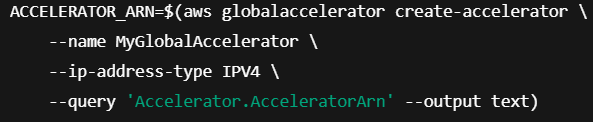
CLI (Global Accelerator example)
Create a Global Accelerator
Create a listener

Add endpoint group for your region


Azure Configuration
Step 1: Create a VM or Container Instance
Manual (Portal) Go to the Azure Portal. Create a Resource Group (e.g., my-global-rg). Select Virtual Machines → Create, choose a free Linux image (e.g., Ubuntu Server free tier). Pick the B1s size (often within free trial limits). Configure inbound port rules to allow HTTP (port 80). Complete the wizard to deploy the VM. Once running, install a simple HTTP server (e.g., sudo apt-get update && sudo apt-get install -y python3 && nohup python3 -m http.server 80 &).
CLI :
Login :
az login
Create resource group :
az group create --name my-global-rg --location eastus
Create VM (with open port 80) :
az vm create \
--resource-group my-global-rg \
--name MyGlobalAppAzure \
--image UbuntuLTS \
--size Standard_B1s \
--admin-username azureuser \
--generate-ssh-keys
Open port 80 :
az vm open-port --port 80 --resource-group my-global-rg --name MyGlobalAppAzure
SSH into VM and start simple HTTP server
Example:
az ssh vm --resource-group my-global-rg --name MyGlobalAppAzure
sudo apt-get update && sudo apt-get install -y python3
nohup python3 -m http.server 80 &
Step 2: Configure Azure Front Door
Manual (Portal) In the Azure Portal, search for Front Door. Click Create a Front Door and CDN Profile. Under Endpoints, add your VM’s public IP or domain as the backend. Enable Routing rules for HTTP/HTTPS. Select Latency or Priority routing. Click Review + create, then Create.
CLI (simplified example):
Create a Front Door profile :
az afd profile create \
--resource-group my-global-rg \
--name MyGlobalFrontDoor \
--sku Standard_AzureFrontDoor
Create an endpoint and attach your VM’s IP as a backend :
az afd endpoint create \
--resource-group my-global-rg \
--profile-name MyGlobalFrontDoor \
--endpoint-name my-global-endpoint
Add a backend to the endpoint (you need the public IP of your VM):
az afd backend create \
--resource-group my-global-rg \
--profile-name MyGlobalFrontDoor \
--endpoint-name my-global-endpoint \
--backend-name my-azure-backend \
--address <PUBLIC_IP_OF_VM> \
--host-header <PUBLIC_IP_OF_VM>
Configure routing rules:
az afd route create ...
(Configure further for latency-based routing, custom domains, etc.)
Google Cloud Configuration
Step 1: Create a VM (Compute Engine) or a Cloud Run Service
Manual (Console) Sign in to the Google Cloud Console. Go to Compute Engine → VM instances → Create Instance. Choose the e2-micro machine type (in the always-free usage for certain regions). Allow HTTP traffic. Deploy and install a simple HTTP server (similar to above).OR Use Cloud Run for a fully managed container. Create a new service from a container image (e.g., gcr.io/cloudrun/hello). Allow unauthenticated invocations.
CLI Authenticategcloud auth login gcloud config set project <YOUR_PROJECT_ID>Create a VMgcloud compute instances create my-global-gcp-vm \ --machine-type=e2-micro \ --image-family=debian-11 \ --image-project=debian-cloud \ --tags=http-server \ --zone=us-central1-a Allow HTTP trafficgcloud compute firewall-rules create allow-http \ --allow=tcp:80 \ --target-tags=http-server (SSH in and run your Python HTTP server or any other web app)
Step 2: Configure Global Load Balancing (HTTP(S) Load Balancer or Cloud DNS)
Manual (Console) Go to Network Services → Load Balancing → Create Load Balancer. Choose HTTP(S) Load Balancing. Create a backend service using your VM or Cloud Run service as the endpoint. Specify global as the load balancing scheme. Create a frontend using a public IP. Review and create the load balancer.
CLI (HTTP(S) Load Balancer example)
Create a global forwarding rule, target HTTP proxy, and URL map
gcloud compute url-maps create my-global-url-map \
--default-service=my-backend-service
gcloud compute target-http-proxies create my-global-proxy \
--url-map=my-global-url-map
gcloud compute forwarding-rules create my-global-forwarding-rule \
--global \
--target-http-proxy=my-global-proxy \
--ports=80
(You would also need to create a backend service and health check referencing your instance or Cloud Run service.)
Verifying and Testing the Project
Obtain the Global Endpoint AWS Global Accelerator or the Route 53 domain. Azure Front Door URL. GCP Load Balancer public IP or custom domain (if configured).
Access the Service Open a web browser and enter the global endpoint (e.g., https://<FrontDoorDomain>.azurefd.net/, your AWS Global Accelerator’s DNS name, or your GCP Load Balancer IP). You should see your “Hello World” or test message from the nearest data center.
Latency Test If you’re using latency-based routing, test from different geographic locations (or a VPN) to confirm traffic goes to the closest cloud region.
Check Console Logs Each platform’s logging and monitoring console should show requests hitting the instance or container in the relevant region.

Common Issues and Troubleshooting
Insufficient IAM Permissions: Ensure you have the Owner or Editor roles on each cloud project/subscription.
Firewall Block: Double-check firewall rules and security groups (port 80 or 443) across all platforms.
Domain Configuration: If custom domains are used, verify DNS records point to the correct load balancing endpoints.
Staying in Free Tier: Monitor usage on each platform. Long-running services could exceed free usage limits if traffic is heavy.
Health Checks Failing: Ensure your simple HTTP server or container is actually responding on the correct port and path.
Conclusion
We have successfully built a Global Multi-Cloud Load Balancing & Traffic Routing environment across AWS, Azure, and Google Cloud. We deployed simple services (VMs or containers) in each platform, then set up global routing with AWS Global Accelerator (or Route 53), Azure Front Door, and Google Cloud Load Balancing. Throughout this project, we learned:
How to configure and deploy resources consistently across different cloud providers.
The basics of creating global routing policies to achieve low latency and high availability.
Techniques to verify and test end-to-end connectivity, ensuring each cloud instance serves traffic properly.
By exploring these steps, we have gained hands-on knowledge of multi-cloud configurations, free-tier usage, and global load balancing best practices.

Popular Projects
What is Cloud Computing ?
Cloud computing delivers computing resources (servers, storage, databases, networking, and software) over the internet, allowing businesses to scale and pay only for what they use, eliminating the need for physical infrastructure.
AWS: The most popular cloud platform, offering scalable compute, storage, AI/ML, and networking services.
Azure: A strong enterprise cloud with hybrid capabilities and deep Microsoft product integration.
Google Cloud (GCP): Known for data analytics, machine learning, and open-source support.
